1-866-4EUNIFY
Cloud-Based Property Management Software
3CX Integration - Server Side
System Requirements:
- 3CX V18 or newer
Download:
Right-click and select Save Link As to download the uManage CRM template: eUnify 3CX CRM Template
Installation:
| 1. Login to the 3CX console as an admin and select Settings | CRM | 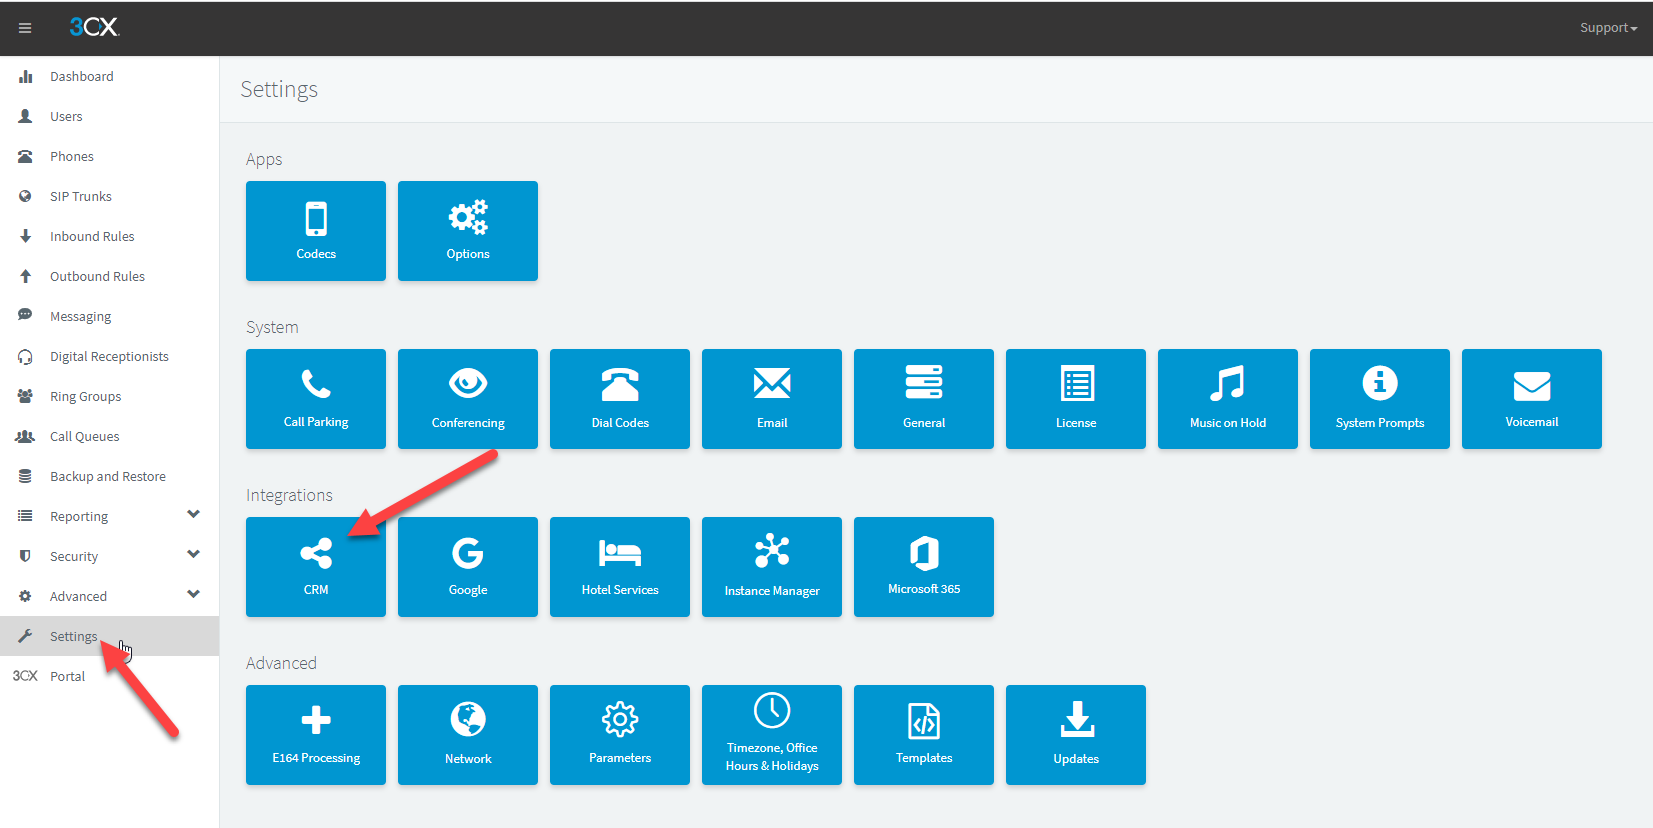 |
| 2. This defaults to the Server Side tab where you specify the integration values | 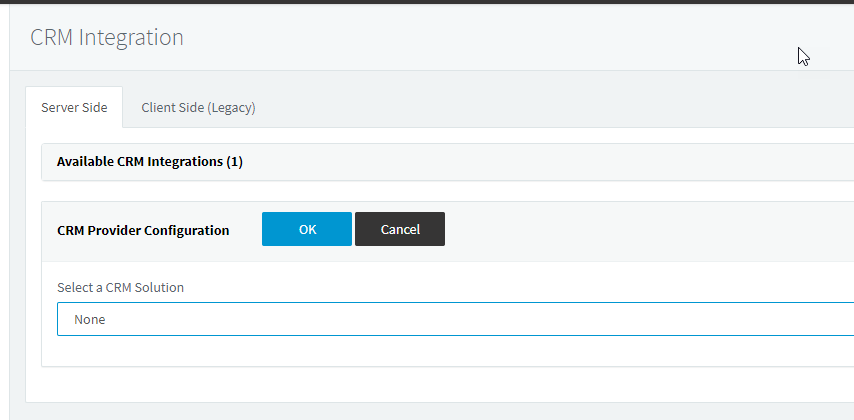 |
| 3. In the Select a CRM Solution section, upload the uManageTemplate.xml file you just downloaded. Set the Query CRM value to Always. | 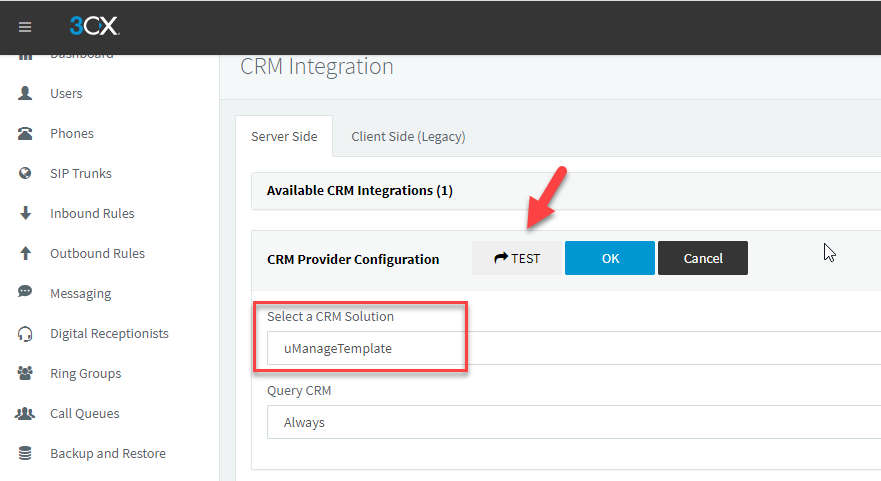 |
| 4. Click the Test button and you should receive a 'Success' message | 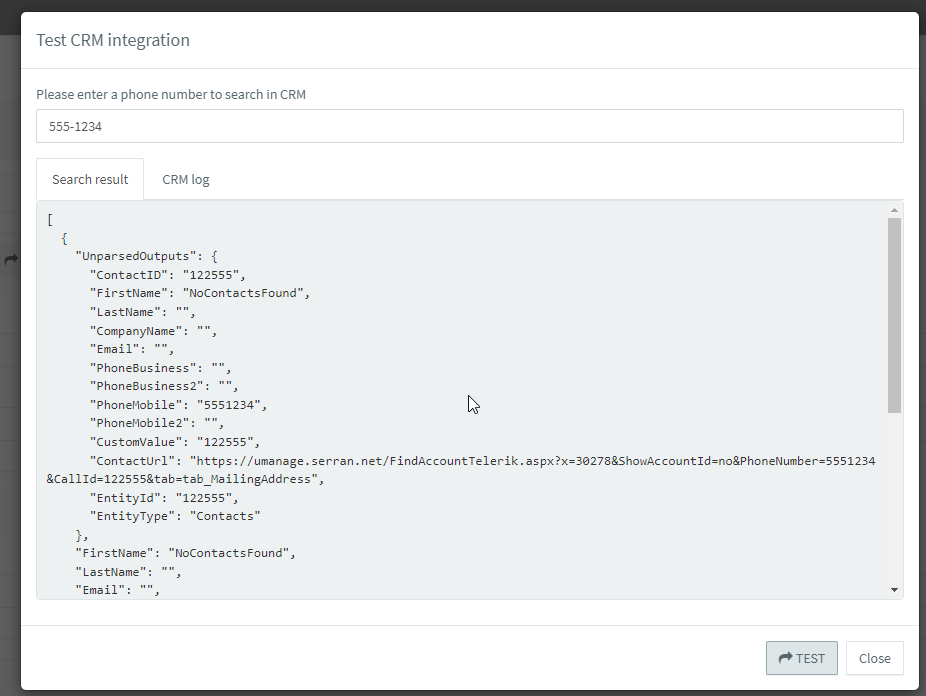 |
| 5. In the API Key section, Enter the uManage Firm Auth Code (located under Firm | Manage Firm | Integration tab). | 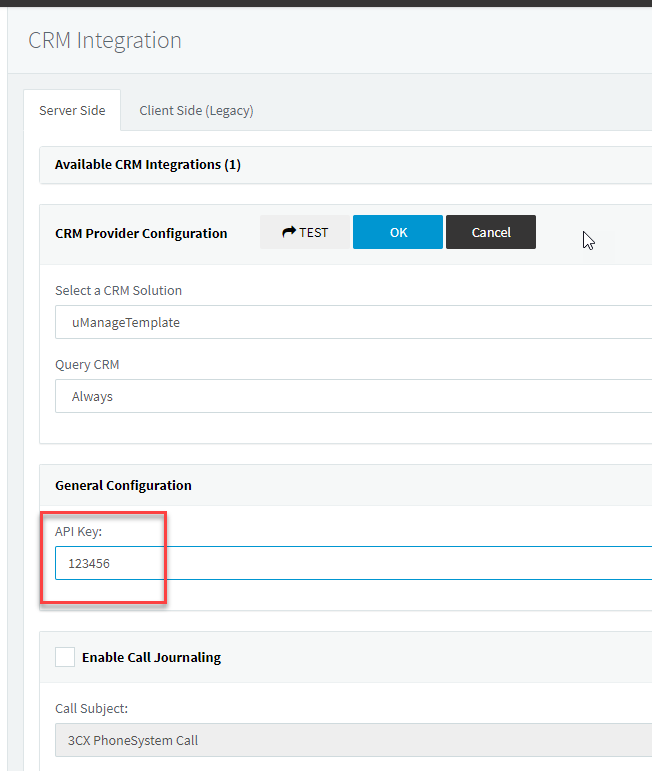 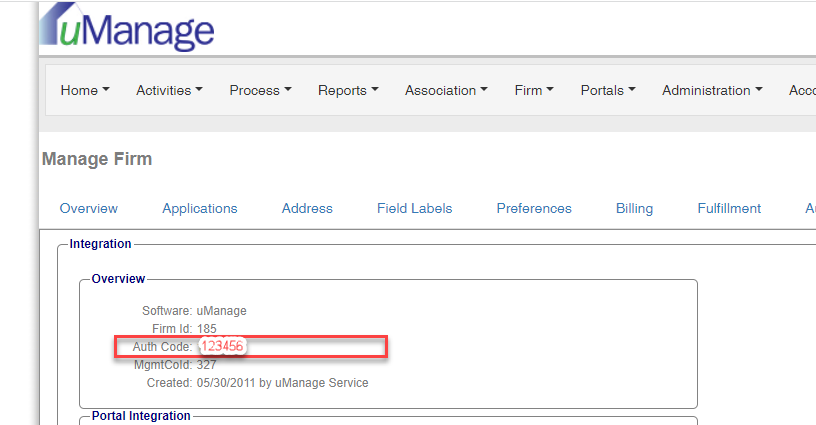
|
| 6. In the Enable Call Journaling section, Set to Checked | 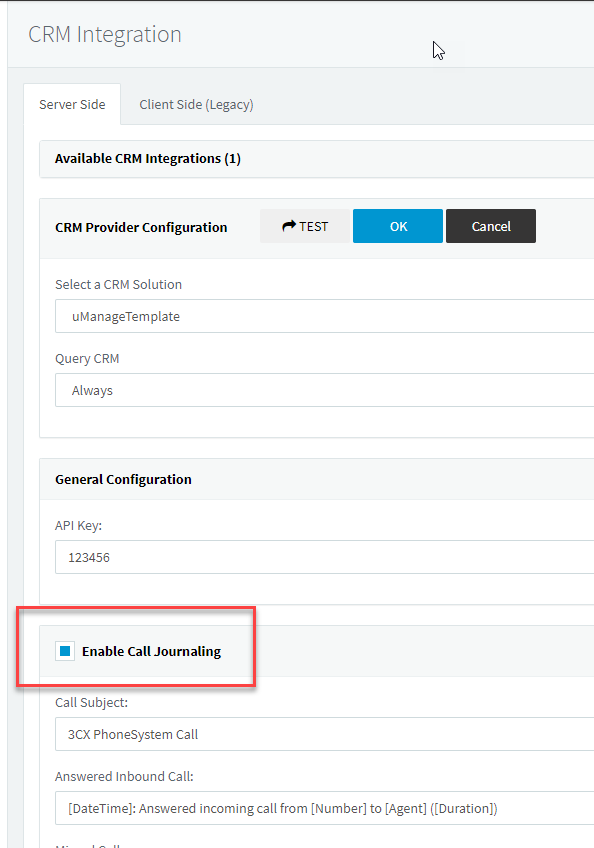 |
| 7. Navigate to the Contacts page under Advanced and click the Options button | 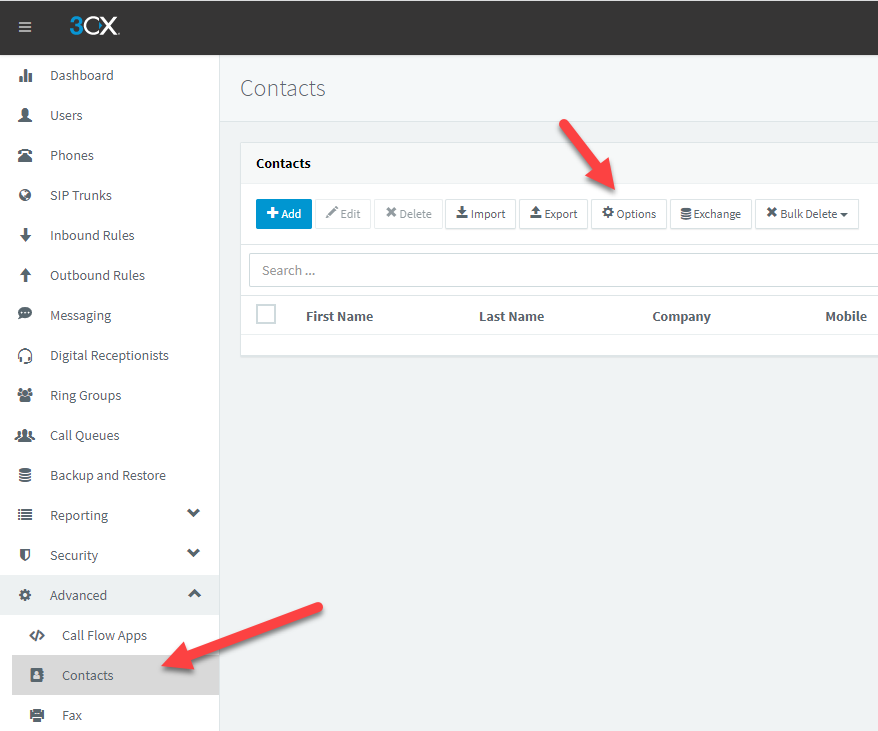 |
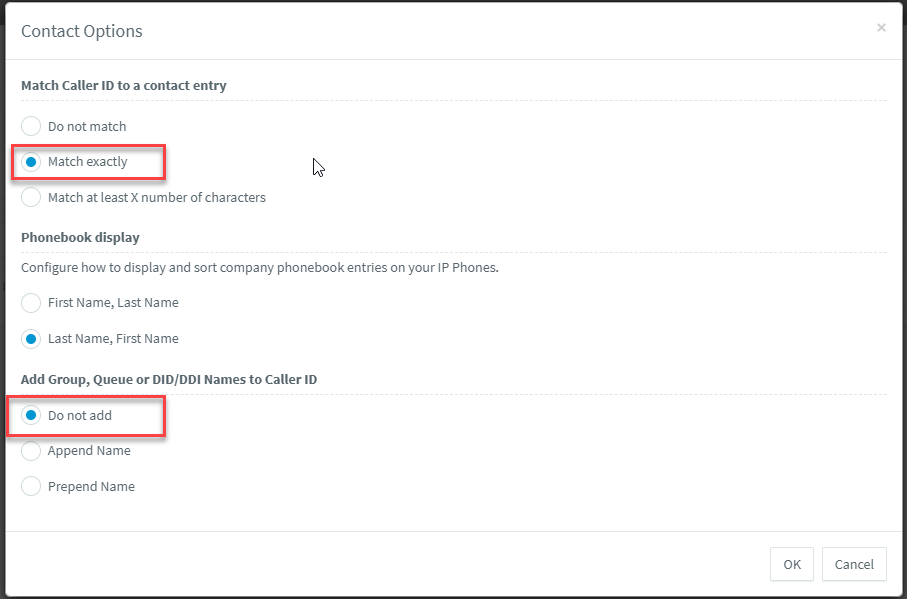
| 8. In the Match Caller ID to a contact entry select Match Exactly In the Add Group, Queue or DID/DDI Names to Caller Id select Do not add |
 |
| 9. Congratulations! uManage 3CX is now configured and ready to use. Next step is to configure the web clicent so when a call comes in, the contact information should open in a new tab. |
|
| 10. Open the web client then goto Settings | 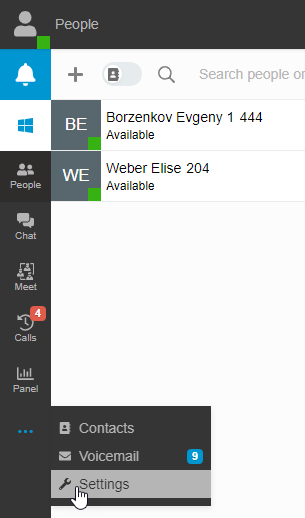 |
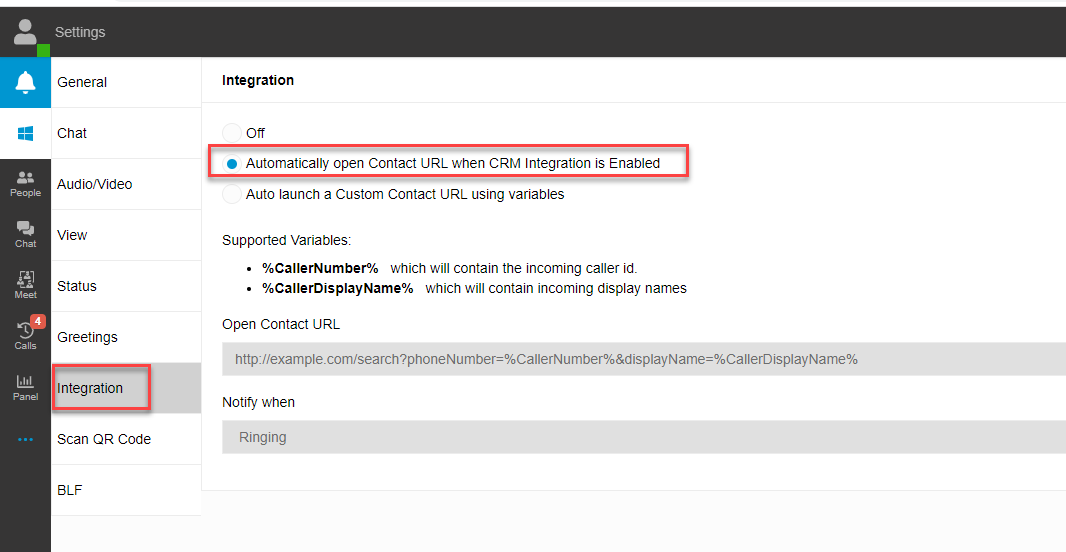
| 11. Select the Integration tab and set the top radio button to 'Automatically open Contact URL when CRM Integration is Enabled'. When a call comes in, this setting will open the contact in a new browser tab.
Alternately, you can select 'Off' which will require the user to click the card in the 3CX popup when a new call comes in. Important: Do not select the third option 'Auto launch a Custom Contact URL using variables' |
 |